Artist charcoal Diary
16 October 2021
I’ve committed to a more sustainable art practice. As part of that, I’m investigating the sourcing of my art materials, including making my own using local materials. Here I describe my first attempt to make artist charcoal in my backyard.
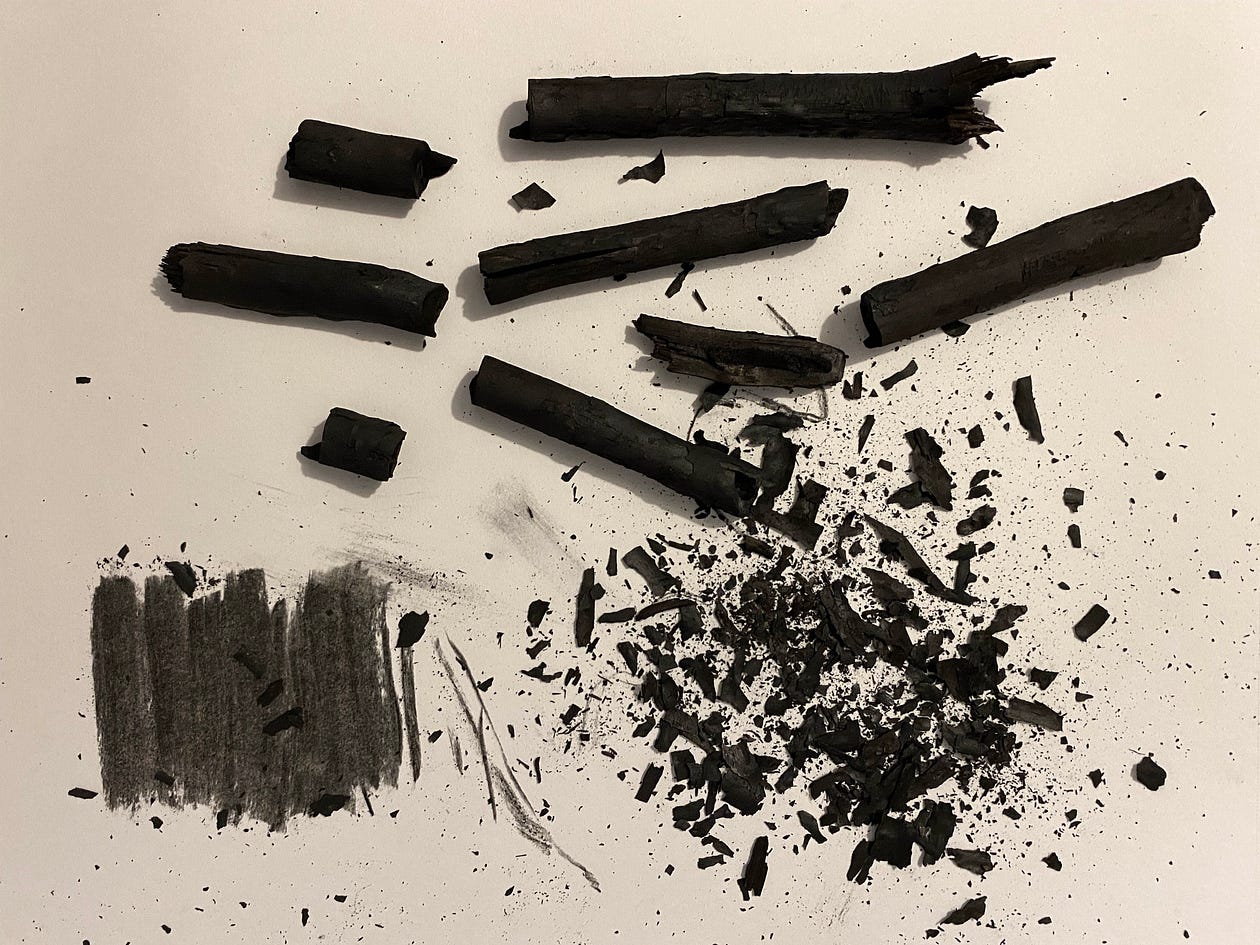 My first attempt at handmade charcoal. Marks made from this charcoal at bottom left. Flakes of bark that I rubbed off the finished sticks at bottom right. The finished charcoal sticks at top.
Materials I used
- Twigs. These were the twigs that became the charcoal sticks.
- Foil. I wrapped the sticks in foil. Foil wrapped tightly around sticks should allow heat in, but not oxygen. With the right amount of heat, the sticks carbonize and become charcoal, but not burn up and turn to ash.
- Fire. I used a fire in our backyard chiminea for the heat source, using our firewood stash.
My process
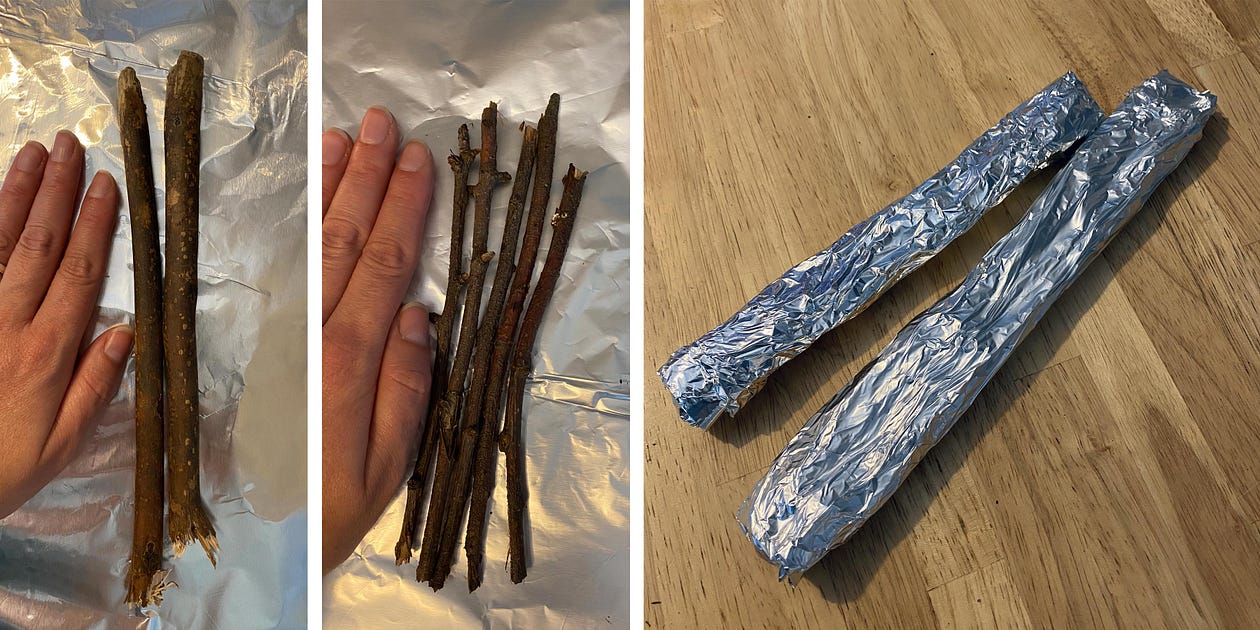 The five thin sticks are wrapped in the smaller foil packet and the two thick sticks in the larger foil packet.
I gathered sticks. I sourced two types of sticks: (1) sticks from our felled crab apple tree, which had grown in our yard for about 40 years, and (2) an unknown hardwood stick my daughter found on a hike. The smaller twigs were about 1/4" diameter. The larger sticks were about 1/2 to 5/8" diameter. I broke them to be in two batches of uniform length.
I wrapped the sticks in foil. Keeping out air prevents the sticks from burning and turning into ash. I used aluminum foil from our kitchen. I had standard weight foil (not heavy duty), so I rolled them up in a sheet of foil. The rolls were about 6–7 layers thick for the smaller sticks and about 3–4 layers for the larger sticks.
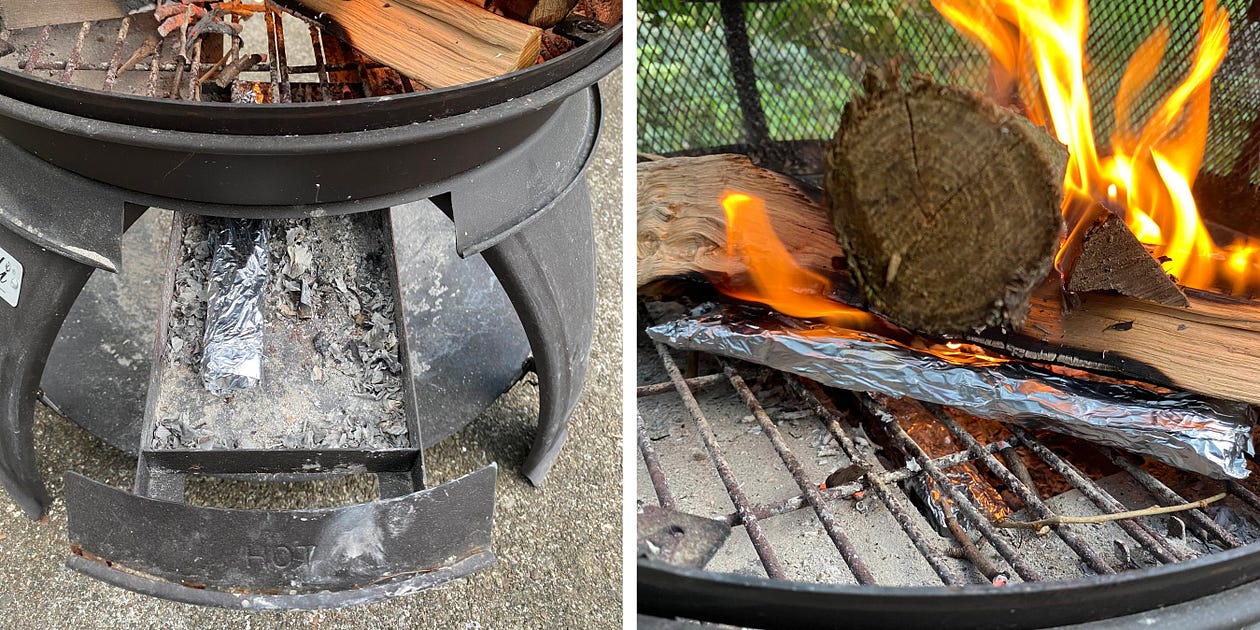 I put the foil packet of smaller sticks in the ash drawer. The placed the foil packet of larger sticks on the grate.
Next, I built a fire and loaded the foil packets. As I was preparing the fire, I realized the ash drawer might be a great place to put the sticks were they could stay hot, but not be directly in the fire. Only the thinner stick pack fit. The other pack was too long.
 The foil pack with thicker sticks was next to the logs and caught fire. Whoops!
I monitored the fire. I located the best spot to place the thicker foil pack so it was close to the logs and embers but not directly in the flame. And, I sat in the backyard on a Friday afternoon and relaxed.
I put out the burning packet! About 20 minutes into the fire, one of the stick packs started flaming. It was the pack that had fewer foil layers and was above the grate right next to the log embers. I pulled it out of the fire and put out the flames. Then, I left it below the fire bowl to cool.
 The stick pack on the left was wrapped with more layers and cooked in the ash drawer beneath the fire. The stick pack on the right caught fire.
The next morning, I unwrapped the stick packs. They looked like charcoal sticks. I hoped they would work. As I handled them, the bigger sticks broke into smaller pieces and the bark crumbled in my hands. I rubbed off the rest of the bark.
Now, to try the sticks. Would they work? Yes, I had charcoal sticks! The smaller sticks drew with a little bit smoother line, but were fragile. The larger sticks were a nice size to hold and still usable despite catching fire.
 My first drawing with my handmade charcoal. This charcoal stick still has some of the bark and knots visible.
Tips for the next charcoal batch
My typical process is to research enough to understand the general gist, and then just go for it. That way I blend basic knowledge with intuition. After that, I’ll optimize my process based on what I learned.
So, here’s what I’ll consider for the next time.
Smooth twig tips — Smooth tips (using hand saw) would be better than rough tips. The rough tips splintered during use.
Keep foil out of direct flame — Foil burns when hot enough. The drawer to collect ash in the chiminea was better for the foil twig packs. Alternatively, and preferably, I’ll look for other metal containers that I may have in my studio (or garage) that can be sealed shut.
Don’t need to remove bark first — Bark was recommended to be be removed prior to creating the charcoal. However, I was able to easily rub it off the hardwood sticks after heating for charcoal.
Try other stick sources — I’ll try using driftwood pieces I collect at Lake Erie or Rocky River that are already smooth and bark free. (This pro tip is courtesy of art educator Anna Chapman).
Stick with 1/2" diameter — I like the diameter of the 1/2" thick sticks, sturdy and easy to hold.
Resources:
Charcoal sticks — video by Center for Art Education and Sustainability (CAES)
How to make drawing charcoal — article by Evan Lindquist