Acorn Ink Diary
6 November 2021
I made this gorgeous ink with foraged acorns from my backyard.
As part of my commitment to a more sustainable art practice, I’m exploring creating my own art materials. This diary catalogs my steps to create acorn ink.
Part One: Brew a base of acorn ink
I gathered 4 cups of acorns in my backyard in Cleveland. Where four of our backyards come together is an intersection of wild shrubs, weeds, and trees, including an oak tree. Mid-October is a little late to collect acorns, but the squirrels did leave enough for me to forage a large bowlful.
After a quick rinse to remove dirt, I put the acorns in a crockpot. I added 8 cups water, covered, and turned the crockpot on low.
After just a few hours, the liquid was already very dark. I left the acorns simmering for a week and the liquid darkened. I made sure to keep the crockpot refreshed with water as it gradually evaporated from cooking off.
After one week, I strained the acorns and poured the acorn ink in two glass jars.
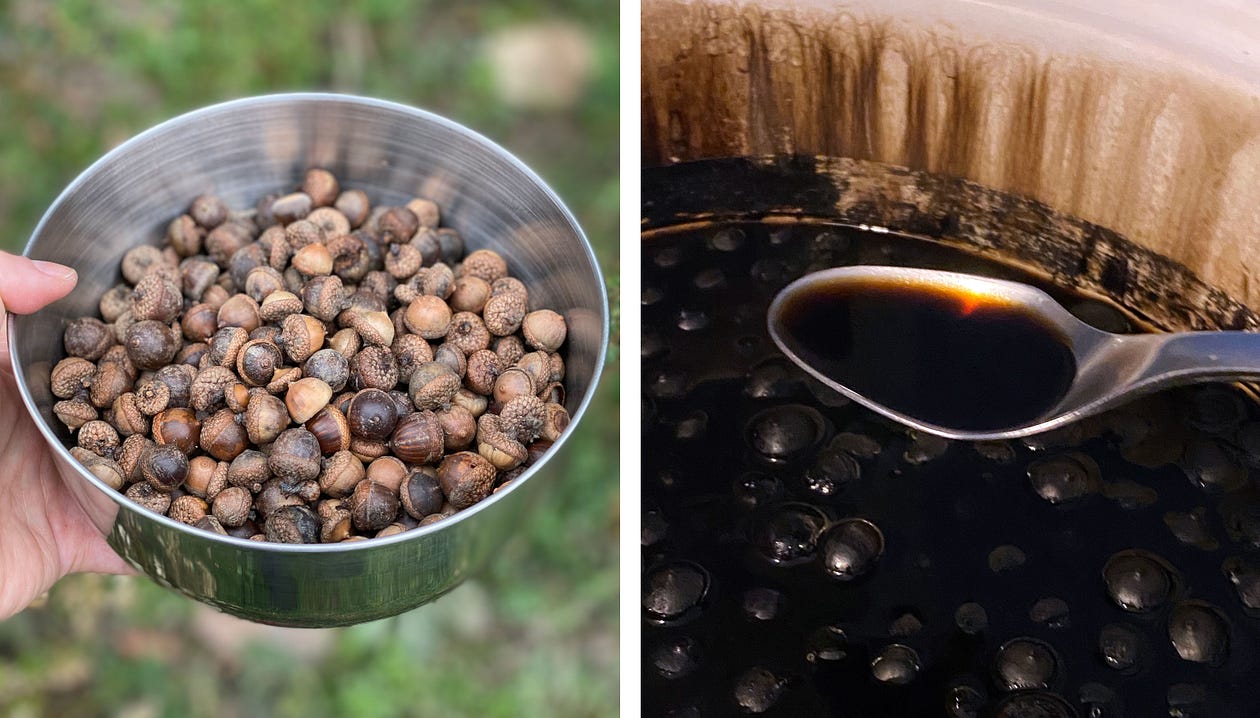 After five days of simmering the acorns in the slow cooker the liquid was an inky warm dark brown
I learned a few things that will improve my process for next time.
Ideal process for acorn ink base:
- Collect acorns and rinse to remove dirt
- Crush acorns (with mortar and pestle or hammer)
- Add acorns to crock pot and fill with water
- Cover and simmer on low for five days
- Add water daily to keep crockpot topped off
- Cool and store liquid in glass jars with lids
Notes:
I left the acorns whole for this first batch. However, in the future, I would shorten the cooking time and potentially strengthen the brew by crushing the acorns before simmering.
The acorn nut (the inside) is edible. However, the ink is created from the tannins in the shell and cap. Consumed in large tannins are toxic and block your body’s ability to absorb nutrients. I used an old crockpot that I’m now dedicated to art material production.
Part Two: Darken with iron vinegar solution
While my acorns brewed, my daughters and I collected metal scraps from the train tracks near my house: spikes, springs, hinges, and random pieces.
I filled a glass jar with the metal scraps. Then, I filled the glass jar with white vinegar. Daily, I poured the vinegar into a separate glass jar to expose the metal parts collection to air.
Adding iron vinegar solution darkens the acorn ink. I added it to one of my two jars.
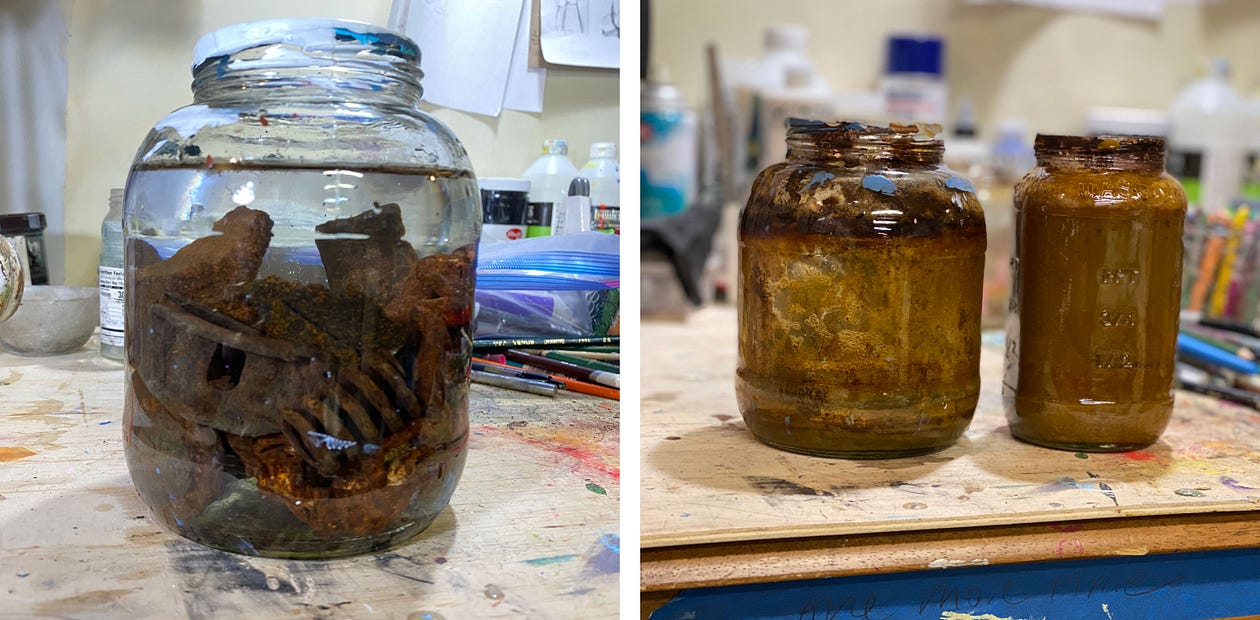 The left image shows the jar the day I combined the vinegar and metal bits. The right image shows the same jar (left side) and a jar full of iron vinegar solution after ten days.
Notes on binders and preserving the ink
The recipe I followed recommends binders to stabilize the ink and help it adhere to paper or other substrates. However, other recipes do not specify binders, and I opted not to use one. I do notice the ink pools on top of paper more than my commercial india inks.
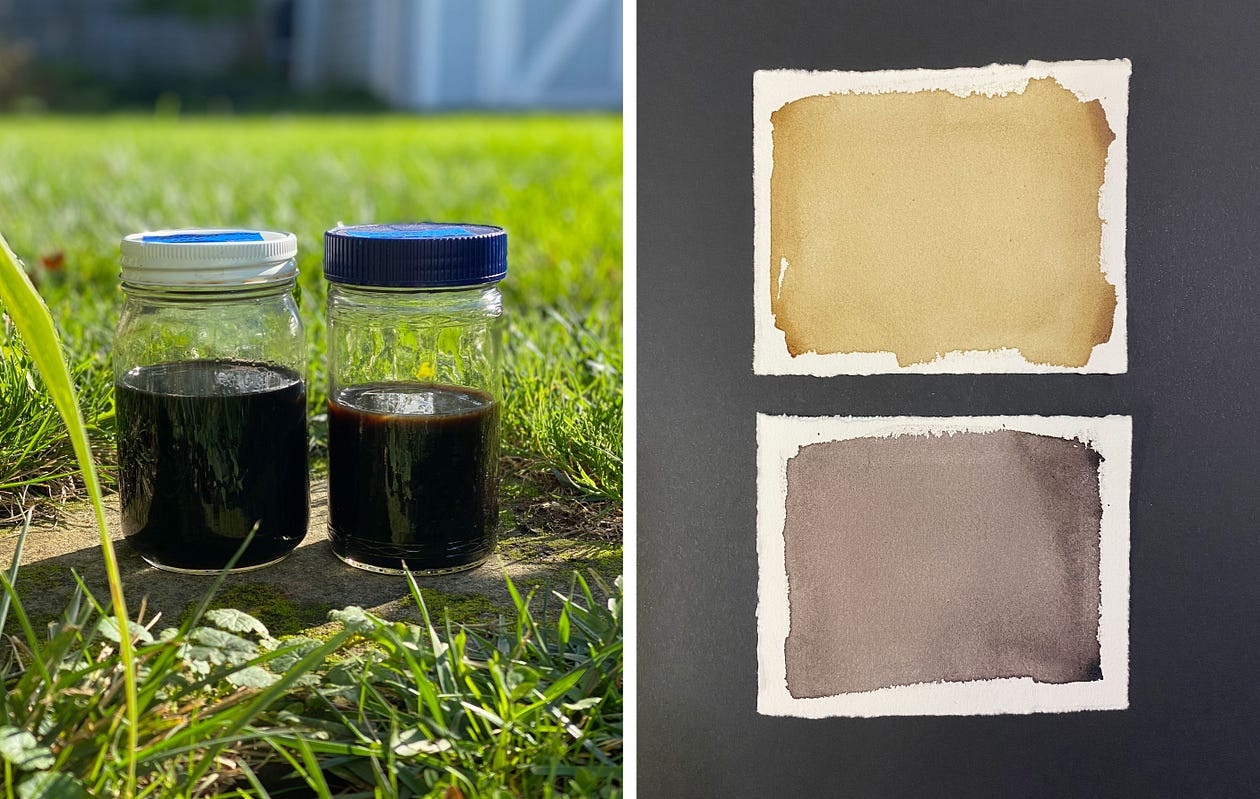 Left image shows acorn Ink in jars. Right image shows acorn ink swatches. Top swatch is acorn Ink with nothing added. Bottom swatch is iron acorn ink (acorn ink plus iron vinegar solution).
Resources:
I followed the Acorn Ink recipe from by Nick Neddo’s excellent book: “The Organic Artist: Make Your Own Paint, Paper, Pigments, Prints and More from Nature”.
The Druid Garden has another useful reference: “Making Acorn Ink — Instructions and Recipes”.